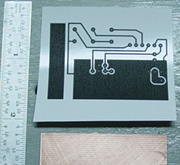
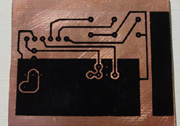
My Jet Printed circuit is shown here next to a small, prepared board.

Overall, a great way to make simple PCB's at home with confidence!
Printed Circuit Boards for the Masses |
Creating PCB's at home has always been a hassle. The basic methods available include manually laying out the traces with trace transfers (not recommended), photoreproduction (specialized, and expensive), or the use of a laser printer using the toner transfer method. This latter has been somewhat hit or miss for me, with variable results, until I did a bit of internet research and discovered an absolutely dynamite paper. All the credit goes to Tom Gootee for finding a paper that really works.
The procedure is simple. You need some Jet Print brand Photo paper, glossy. The stuff I bought was Jet Print Multi-Project Photo Paper, 07033-0. Jet Print color codes their inkjet photo papers... look for the stuff with the green band. About $0.75 per sheet here in Texas.
The next step is to produce a positive image of the traces you want, using almost any editor, CAD program, etc. The image must print to the exact scale needed.
|
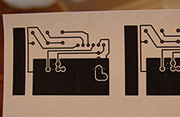
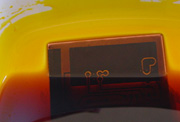
Once the image is created, test-print the traces on a sheet of regular paper. You must use a laser printer; inkjet printers will not work. If it all looks good, load a sheet of the Jet Print into your printer tray, set your printer for darkest image, and print. Here is the image of my traces printed to the Jet Print paper. |
|
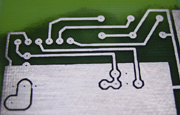
Cut out the traces, leaving a bit of paper
surrounding the traces as a border. Prepare your copper
board by first sanding lightly in a cross-hatched pattern
with 400 grit paper. Next, degrease and clean the copper
with alcohol or similar. My Jet Printed circuit is shown here next to a small, prepared board. |
|
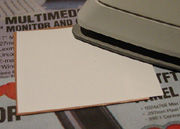
Borrow an iron from the house boss. Set it on its highest temperature, and allow it to warm up. Tack the paper down on one corner of the board. It will immediately begin to fuse and stick. Continue to iron the paper onto the board. Go ahead and use a bit of pressure. This 2" sq. board was ironed for about 3 minutes. Use the edge of the iron as well to apply higher pressure in a pattern. You can tell when you're done because you will actually be able to see the traces through the paper. Something in the heating process causes this phenomenon. Give it another minute for luck, then, drop the fused paper and board... |
|
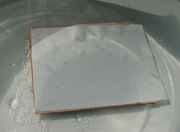
...into a bowl of hot water. It will immediately bubble and begin to separate from the copper. Don't rush things, let it soak for a good 10 to 30 minutes. You may need to help the paper separate a bit... it won't float free on its own. But if you used a good hot iron, you won't have any trouble with trace mask peeling off the copper. It really fuses well. |
|
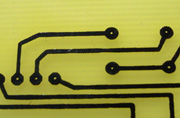
The PCB is ready to etch! Note the very clean image. No melting or blurring at all! |
|
Into the ferric chloride etch. Keep an eye on it and agitate occasionally. A plastic fork is handy to lift and inspect the board. |
|
The fused toner does a superb job. No creep of etchant under the mask is evident. |
|
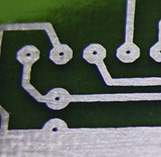
Here is a nice, close view of the etched board before the toner is stripped to reveal the copper. The pads in the lower left were originally octagonal, and they retain their shape perfectly. |
|
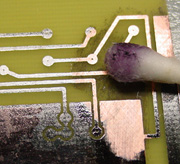
The only reliable solvent to remove the toner is acetone. Other solvents such as xylol or alcohol work, but it is very slow! |
|
This is the completed board. The copper looks tin-plated, but it is a trick of lighting... they are still copper. All that remains is drilling. |
|
A super close-up. Note the clean traces and lack of
pin-holes or etchant bleed. These are 20 mil traces. Overall, a great way to make simple PCB's at home with confidence! |